Getting images to look as you want can be a challenge. We hope that the tips included in this tutorial may help solve some the more likely issues you may experience.
Image Formats
The first issue is to get the image in the correct format. The following formats are compatible with today’s web browsers:
- jpeg (jpg)
- png
- gif
If your image is not one of the formats above we recommend using MS Paint (Windows 7 or higher) or any other decent graphics manipulation software, say GIMP, to “Save As” or “Export” to one of the image formats above.
Resizing Images
The image you want to include in the email may not be the size you require. It is possible to scale the image after inserting it in the email (using the image properties in the email editor) however, this may cause the email to not appear correctly with some email clients, like Outlook.
We recommend that the image be re-sized using your preferred graphics software (eg MS Paint, or GIMP). This will then ensure that the image is displayed correctly in all email clients that support images.
Inserting Images
Lets say we want to send out an email like the one below:

Now we want to add a sponsor logo at the bottom of the email. (Note, the banner image is automatically pulled from the registration form design).
Follow these steps to add the side image:
1. Ensure the cursor position is in the place where you want to insert the image. In our case, at the end of the email.
2.Click the images button as shown below:

3. The click the “Browse Server” button:

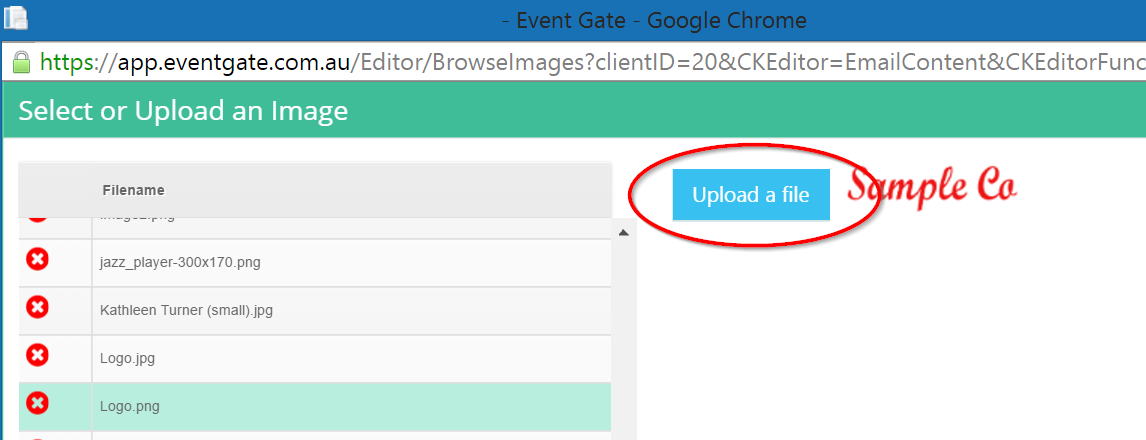
4. Then click the “Upload a file” button:

5. Now select the image you want to upload and click the “Ok” button.
6. Then click “Ok” on the Image Properties dialog.
7. Click “Ok” and the image will be inserted:
